Showing posts with label portrait. Show all posts

Saturday, January 30, 2010

Three light setup

For the weekend we did have a single portrait shoot setup but due to the snow coming in and road conditions that one got canceled.
We (Emma and I) had been viewing several online videos describing different light setups to create portraits.

One that we liked in particular is The classic three light studio portrait from Pro photo life. Jim Talkington has made several great videos you can find in their video library section.

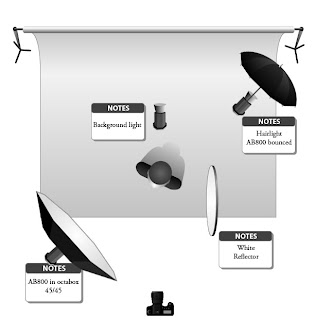
The three light setup we were going to do would be something like illustrated below.
  • One main light at 45/45 (meaning at a 45 degree angle to the camera and pointing down at a 45 degree angle). This main light will be setup to create Rembrandt lighting.

  • One reflector for fill in to minimize the contrast.

  • One hair light positioned opposite the main light.

  • One background light to create separation between the subject and the background.

For each step (inspired by the video) we are taking a single shot to show the progress.

First we position the main light to create a Rembrandt style portrait.
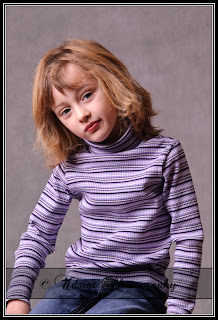

Second we add the reflector on the right side of the subject. After adding the reflector the contrast can be modified by simply turning the main light. If more light fall on the reflector the contrast will decrease. If less light falls on the reflector (or the distance is increased) the contrast is increased.
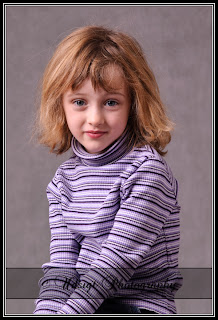

Third we add the hair light opposite the main light also pointing down 45 degrees.
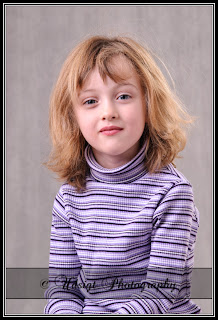

And last but not least we are adding the background light to create separation between the subject and the backdrop. In this case the backdrop is a grayish muslin but it could be a painted wall or paper as well.
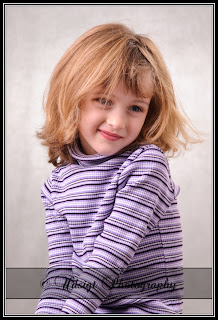


After final light is placed and lights are adjusted the little model of course had to dash off to get a touch of makeup on. So after a good half hour of rummaging around the bathroom I was allowed to take a few more photos.


This setup can be adjusted to fit the subject(s) by fine tuning each light. The setup we did here is pretty sturdy and will give repeatable and consistent results. Now that we have the setup up and running I am planning to put a few markers to indicate where to position the lights in the future making the setup quick to establish next time an opportunity comes knocking on the door :-)

Thursday, October 8, 2009

Family portrait session

Past Saturday I got an opportunity to photograph a lovely family.

Kids are always interesting and it's not always easy keeping an eye on everything but I must say these children were very nice :-)

Here is a little sneak peak of the photos from the garden of the Carlyle house in old town Alexandria.


Wednesday, March 18, 2009

Sunday afternoon portrait shoot

This past Sunday Lily stopped by to get a few headshots to use in her portfolio while pursuing her acting career.

I used a pretty simple setup. On camera right (about 45 degree angle) I had my alien bee B800 with a large octabox and on camera left (about 80-90 degree angle high) I had my Nikon SB800 with diffuser and roughly 1 stop brighter than the main light.

Now I got around to finishing up a few of the photos and I guess eventually I will get some of them incorporated in a portrait section on my web site (http://udsigt.webhop.net).


After capture my workflow is to import the photos to lightroom using the camera raw plugin which does a very nice job at ensuring colors and light is right. (read more in this post).

After import I had Lily pick the top 30 photos to continue work on these.
Retouching portraits like this got soo much simpler and faster. I am pretty sure Emma could actually do it... it's that easy.
To process photos I take a few simple steps in lightroom:
1. Adjust overall brightness, color and contrast.
2. "fix" complexion with portrait professional (right click and select edit-in)
3. Crop to print size and if multiple sizes are needed create virtual copies for these.
4. Select all and make virtual copies
5. Select virtual copies and change to black and white with the develop setting.

Now all that is left to do is export and/or create a web gallery (using lightroom of course).

If you noticed it in the steps above you are absolutely right. I did not use photoshop at all in any of these steps...
The key to quick processing is the portrait professional package. You can read more about it here.

Thursday, March 27, 2008

Christmas portraits

Soo It's getting to be that time again. Christmas is getting closer and cards are waiting to be send out. But what are your preferences and experience with getting christmas cards?


I did the first test shot and trying to get ideas for a christmas card picture. This is just one example but you are more than welcome to drop a comment with your oppinion and/or suggestions :-)


As some may know I like doing photos in the studio and well it's fun stuff ;-) but what are your preferences for getting the special photo for a christmas card? Take the poll and see what others think.


Vovici Online Survey Software
Thank you for stopping by
--Peter

Hey all

Here's the first test with a new light setup.


It is very nice having the chance to play with equipment that will get the job done right ;-)

Now I look forward to getting the Christmas pictures done and sending out cards to family and friends.

The setup consists of a white backdrop (botero) lighted by a Nikon SB-800 flash @1/2 power. front camera right I have a Alien Bee AB800 with a shoot through umbrella and everything is captured with my Nikon D70s teethered to a computer capturing the photos with Nikon Camera control and sending them directly to lightroom for a good preview.
Just in case you wanted the technical details ;-)